customer information

How to use the Customer List
This short video demonstrats some of the ways to use the customer list. Click Here to EnlargeCustomer Detail Explained
This short video demonstrats the customer detail page in The Service Program. Click Here to Enlarge
Addig new customers:
There are 4 ways to add customers into The Service Program. Just click "Take Me There" to view the guide.
1). Create a customer in QuickBooks and sync with The Service Program Take me there
2). On task entry if you enter a new customer you will be prompted to add the new customerTake me there
3). From the Customer List you can enter a new customer at the bottom of the listTake me there
4). Use the add customer button under the Customer Info drop down listTake me there
Take me there
2). On task entry if you enter a new customer you will be prompted to add the new customerTake me there
3). From the Customer List you can enter a new customer at the bottom of the listTake me there
4). Use the add customer button under the Customer Info drop down listTake me there
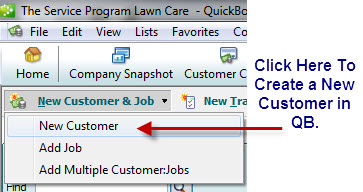
- Create new customer in QuickBooks.
 Enter a customer/job in QuickBooks by clicking the new customer/job button in the customer center of QuickBooks.
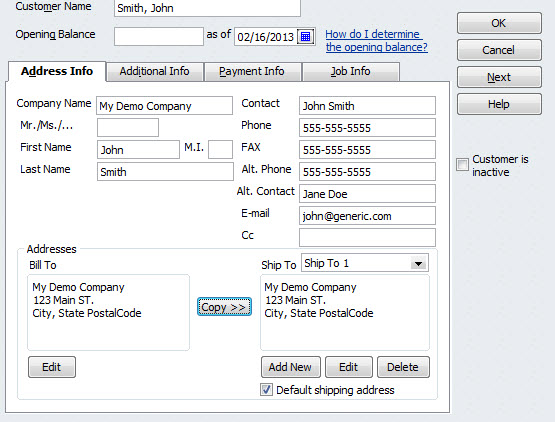
 Fill out the customers info using the pciture below as a guide. *NOTE* Make sure the customers service address is in SHipping Address Line 2.
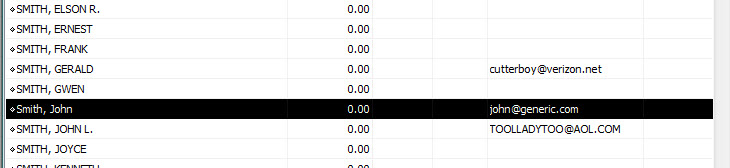
 After clicking OK on the previous window to save the customer, we should see the new customer in our QuickBooks Customer List.
 Click on the Update QuickBooks icon on the toolbar in The Service Program.
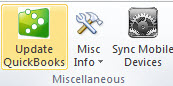
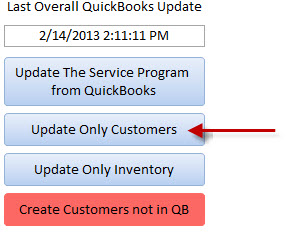
 On the QuickBooks Maint. Menu, click update only customers to have The Service Program sync over the new customer we just created.
 We then can click customer info and then customer list in The Service Program and make sure the new customer was added correctly.

- Creating a new customer on task entry.
- Adding a new customer on the customer list.
- Using the Add New Customer Button in the Customer Info Drop Down
- Deleting a customer using the customer list.
- Marking a customer as inactive in QuickBooks
- Creating a Pop-Up Alert
- Viewing QuickBooks Notes
- How to use customer detail.
- Customer Detail Video Walk Through
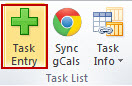
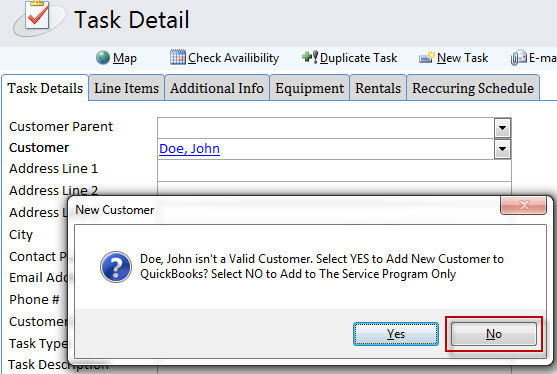
Click the green plus sign in the top menu labeled "Task Entry" and starting typng the new customers name in the dropdown labeled "Customer".
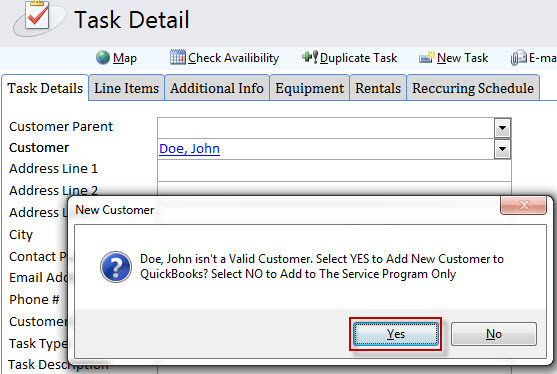 We now have 2 options to finish adding this new customer. By clicking "Yes", it will open a window prompting you to fill out the rest of the customers detials. *NOTE* for this step to work, you MUST HAVE QUICKBOOKS OPEN AND RUNNING. Also note that the required fields are in bold.
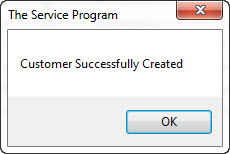
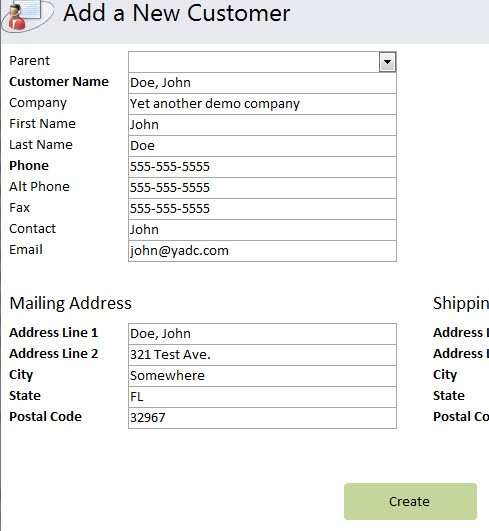 Click CREATE when you have filled out all the required info to add this customer to QuickBooks, if done correctly you will get a pop-up telling you the customer was added successfully. If you get an error message there are a few things to look for: check to make sure that customer doesnt already exist in QuickBooks, make sure all the required fields in bold are filled out, or make sure that QuickBooks is open and running.
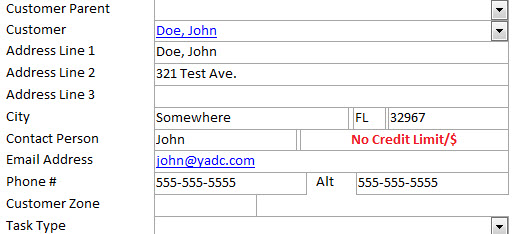
 If we click NO on the pop-up when typing the customer name it will allow us to continue creating the task and it will add the new customer ONLY to The Service Program where it can later be synced into QuickBooks. This is what we call creating the customer on the fly.
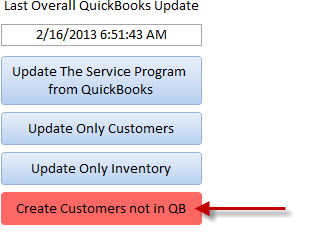
 Once we finish creating our task, we can now sync the new customer into QuickBooks by clicking on the "Update QuickBooks" button on the top menu and then press the red button "Create Customers not in QB" to batch create all customers added on the fly in The Service Program.
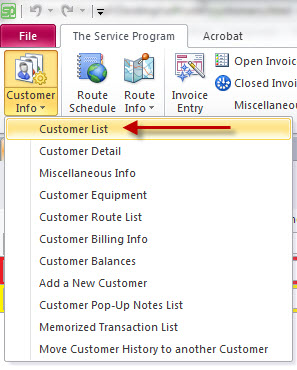
 Click the Customer Info button on the top menu and then click Customer List.
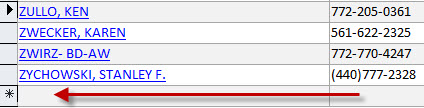
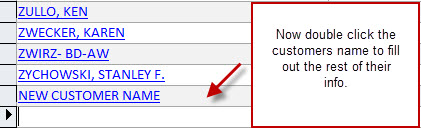
 Scroll down to the bottom of the customer list and on the line with the (*) type the new customers name.
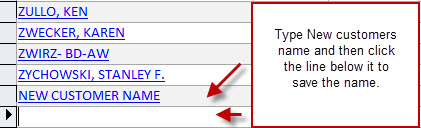
 Once you type the customers name, click in the line below the name you just added to save that new customer name in The Service Program.
 Double click the new customers name you typed to open them in Customer Detail where you can fill out the rest of their info.
 Once we finish filling out their info in customer detail, close the customer detial window and click on the "Update QuickBooks" button on the top menu and then press the red button "Create Customers not in QB".
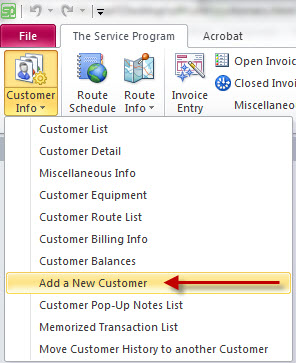
Click the Customer Info button on the top menu and then click Add New Customer.
Once we finish filling out their info in customer detail, close the customer detial window and click on the "Update QuickBooks" button on the top menu and then press the red button "Create Customers not in QB".
Click the Customer Info button on the top menu and then click Add New Customer.
 Fill out the rest of the customers detials. *NOTE* for this step to work, you MUST HAVE QUICKBOOKS OPEN AND RUNNING. Also note that the required fields are in bold. Press Create when finished. You should see a popup letting you know the customer was created successfully.
Deleting customers:
1). Deleting a customer from the customer list.
Take me there
2). Making the customer inactive in QuickBooks and then updating only customers.
Take me there
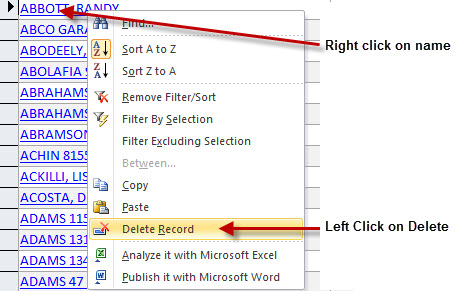
Click on the customer info button on the top menu and then click customer list.
Find the customer you want to delete and then right click on their name which is blue and underlined and then click delete record
 In QuickBooks, go to the customer center and then find the custoer that you want to remove. Right click on their name and then left click on Make Inactive.
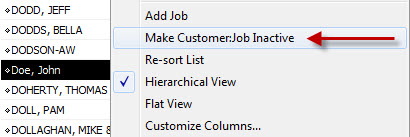 Go back to The Service Program and press the "Update Quickbooks" button on the top menu and then select "Update only Customers".
Customer Popups/Notes
1). Setting a pop-up alert for a customer.
Take me there
2). Viewing QuickBooks Notes in The Service Program
Take me there
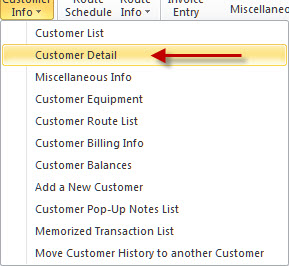
Click on the customer info button on the top menu and then click customer detail.
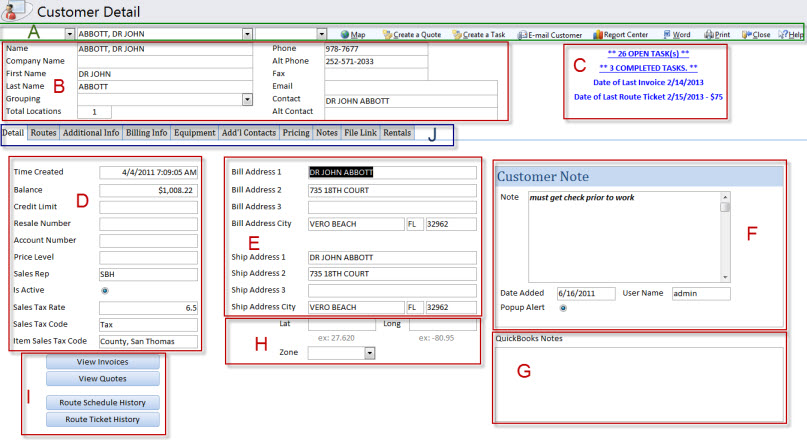
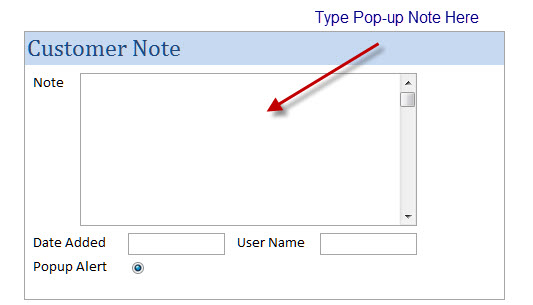
 In the lower right half of the screen you will see a area labeled "Customer Note". You can use that field to store any message about that customer. It will popup every time the customer is selected throughout the software.
 Click on the customer info button on the top menu and then click customer detail.
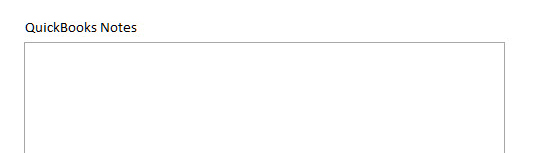
In the lower right half of the screen you will see a area labeled "QuickBooks Notes". All your customers existing notes in QuickBooks can be seen here. Please note that this field is not synced back to QuickBooks. Start entering all new notes on the Notes tab inside Customer Detail.
Click on the customer info button on the top menu and then click customer detail.
In the lower right half of the screen you will see a area labeled "QuickBooks Notes". All your customers existing notes in QuickBooks can be seen here. Please note that this field is not synced back to QuickBooks. Start entering all new notes on the Notes tab inside Customer Detail.
Customer Detail
1). How to use customer detail.
Take me there
2). Video Walkthrough of the various customer detail tabs.
Take me there
Click on the customer info button on the top menu and then click customer detail.
The picture below describes the layout of the customer detail page and demonstrates how to use it.